
Sewing the ultimate pair of trousers is like the sewist’s Holy Grail. We’re searching for that perfect combination of fit and style, and hoping the next sewing pattern we try will be our new ‘tnt’ – ‘tried’n’true’. Something we’ll go back to again and again. When I sew trousers, the most important thing for me is getting a great fit on the hips and waist and I’m happy to say that the Sasha trousers by Closet Case Patterns really hit the spot.
I was unusually cautious with this pattern as I was quite determined to get the best fit I could. I traced the size 14, which seemed like it should be too large – I’m a UK 12 generally, which I believe equates to a US size 10. It just shows how important it is to go with your measurements when choosing a size, rather than what you ‘think’ you should be! I decided to make a calico muslin, which was so worthwhile. It took about 30 minutes start to finish to cut the legs and sew them together. If you do this, just sew up the centre seam and leave and opening in the back or side seam – no need to faff around with a zip fly if you’re just checking basic fit.
The calico was a superb fit, if a little snug. However, this pattern is designed for fabrics with some stretch, and my grey denim has a little give so I went with this size. When I cut the calico I left extra fabric at the waist as I know these trousers are designed as mid-rise. I’ve really become used to wearing trousers which sit at my natural waist so I wanted to test the fit here and adapt as necessary. Before I sewed all my own clothes I used to put up with all those low-rise jeans which seemed to be the only kind available, but no more! Now I’m the boss of my waistbands!!
This is the calico before I whizzed things up on the machine – you can see the excess fabric at the waist, which simply follows the lines of the pattern and tapers towards the waist. I sketched in the centre front seam and sewed on that, ignoring the fly extension.

My daughter’s face was a picture when I tried these on. Being unfamiliar with the toile process she was alarmed that these might actually be my new trousers!
Having made the decision to go with a higher waist, I then took the time to make my only alterations to this pattern. I raised all the relevant pieces by 3cms – and there were a lot! This included fly sections and pocket pieces – even the lining of the back welt pockets which extends right up to the waist. I did not use the lengthen/shorten line on the pattern because I wasn’t adding to the crotch depth/rise. If I had used that, the waist would have risen, but then been too big to sit correctly further up. Instead, I tapered all the pattern pieces, following the trajectory of the lines I was extending. If you do this, it’s important to layer pockets pieces with the trouser legs to ensure that everything matches up as it should.
Here’s a pic of the pattern tracing process:

The other consideration was the waistband. Because I was effectively narrowing the waist so that it would fit at my natural waist, the size 14 waistband would have been too large. I took some measurements and traced off the size 12 waistband, which fit perfectly.
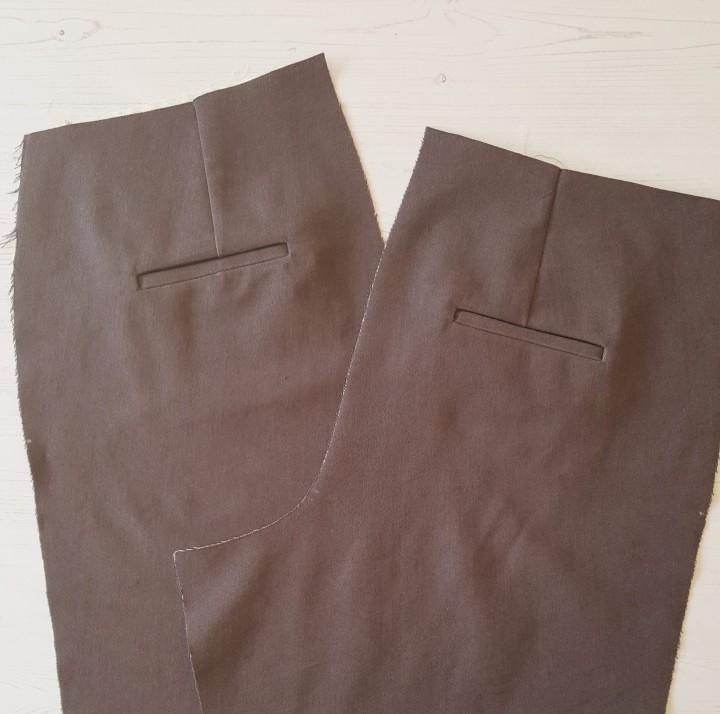
I didn’t take many photos during the sewing process. Everything was very straight forward. The instructions are brilliant as usual, and there is also a fabulous sew-along on the Closet Case website. I decided to add the welt pockets, and here is a photo before I began to put everything together. These are definitely for decoration purposes only, as they are quite tiny both in capacity and external appearance. I never ‘use’ back pockets anyway, but you wouldn’t even be able to slip your phone safely in these.
Anyone who has sewn the Ginger Jeans will know that Heather Lou, of Closet Case, has truly nailed it with her fly construction technique and hand-holding instruction. This was plain sailing and produced a great result.

I used a slightly longer zip to accommodate my higher waist, but I think if you use a metal zip of the recommended length you may still be in the position I was in – namely having to pull teeth out above the seam line. This is referred to in the instructions, so be prepared. If you use a nylon zip you can just cut the top off. This is the first time I’ve needed to take teeth off a metal zip and to begin with it had me cursing. However, I think the trick is to make sure you are grasping the very edge – pinch firmly and then tug them off. If you grab things too far over you’re pulling the zip tape as well. This was an uncomfortable parallel for me as I had just had a tooth extracted the day before and I’m sure my dentist had to pull as hard as I did with these!!

I turned up the hems exactly as per instructions and I like the length. All told, I absolutely love the fit of these trousers and they’ll be perfect for the utterly random weather Britain enjoys in the Spring.
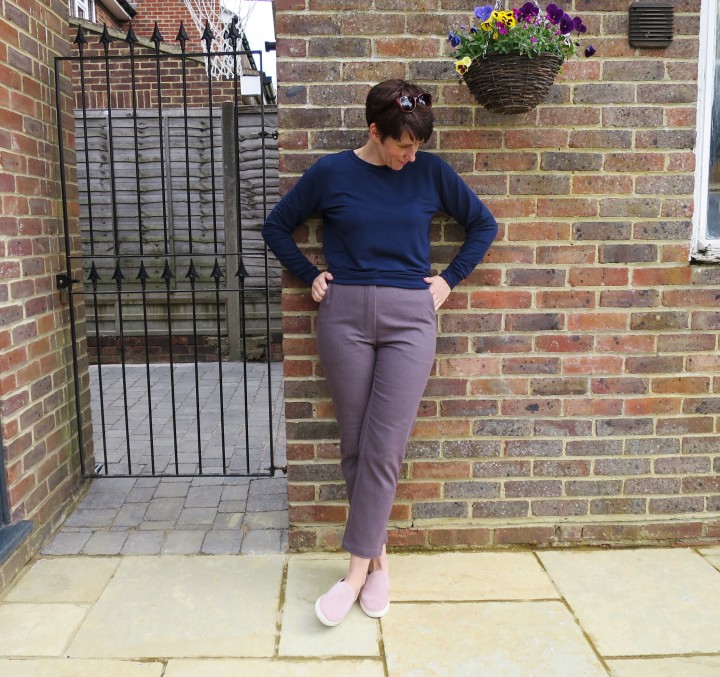


And a goofy photo to show off the higher waist!


Great fit!
LikeLiked by 1 person
Thanks Claudia, I recommend the pattern!
LikeLike
I’ll keep it in mind! In the meantime, I’ve signed up for a class to make the Lander pant. I figured having some in-person guidance was a good idea for this one.
LikeLiked by 1 person