
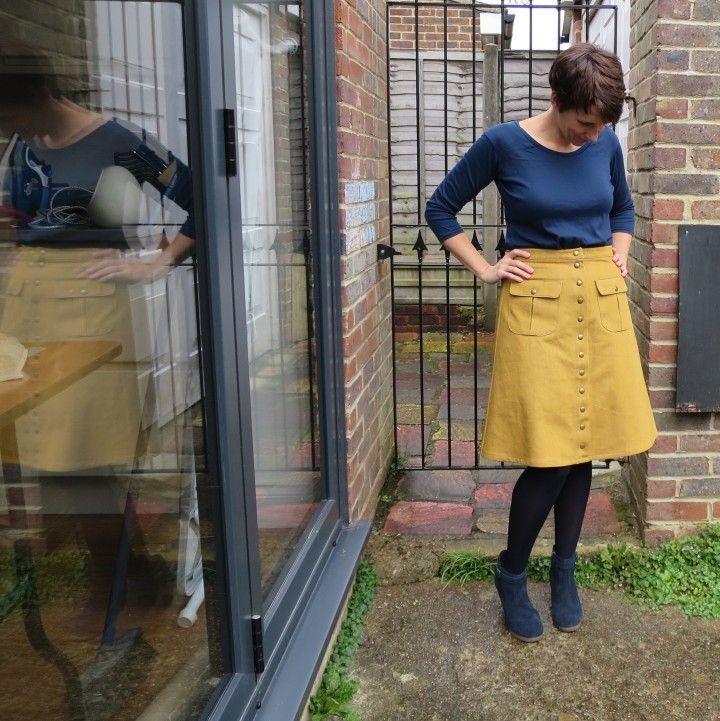
I really do love my dressmaking, but too often I’m overly literal and end up making rather a lot of dresses. My Brumby skirt got such a lot of wear over the summer, and I surprised myself with how much I like the high-waisted look in skirts, but the Brumby doesn’t work for me with winter tights. Although I’d noticed the Pauline Alice Rosari Skirt before, I hadn’t paid too much attention until I spotted an Instagram photo of Fiona’s gorgeous mustard corduroy version with snaps. I can’t pull of the mini version as I’m not one for showing off my legs, but it did make me click my way to a pattern purchase and dig out some weighty mustard denim that has been languishing at the bottom of my fabric basket for over a year.
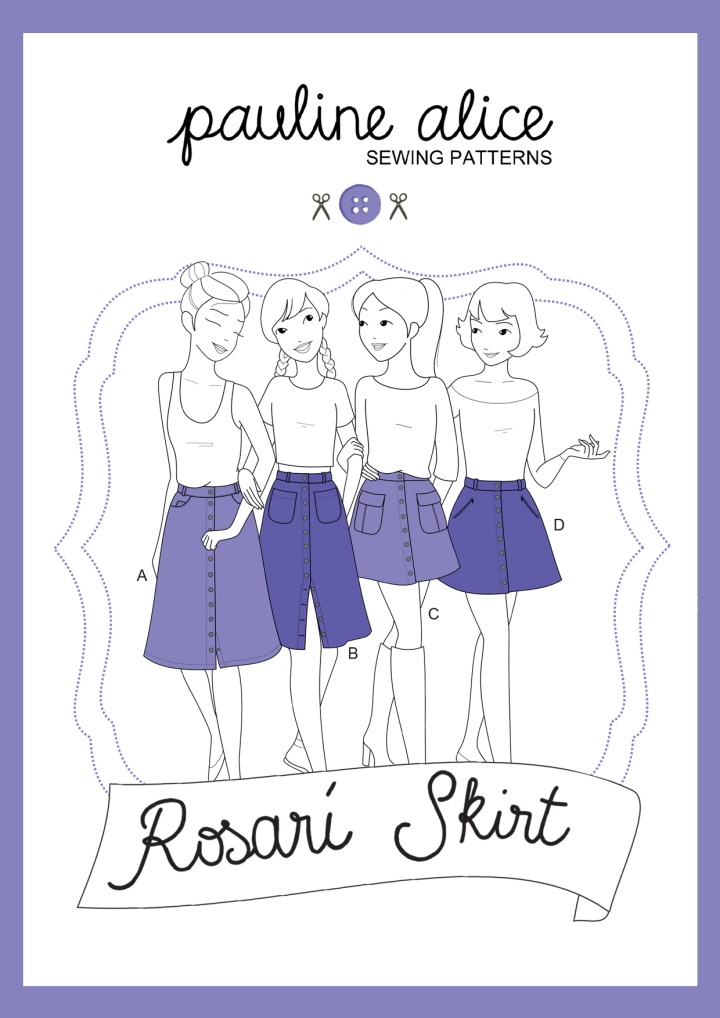
Here is the artwork for this pattern. There are two lengths, and a few different pocket options. After hashtag-hunting on Instagram to see what might work for me, I decided to go for the midi with the option ‘C’ pockets. Following the measurements on the pattern I made a size 42 with no alterations whatsover. Perfect-out-of-the-packet is what this is!
Before all the fun construction begins, the pockets need to be made. This involves some very careful pressing as it’s not easy to turn under the seam allowance to get a neat curve. I took my time over this and I’m pleased enough with the result.

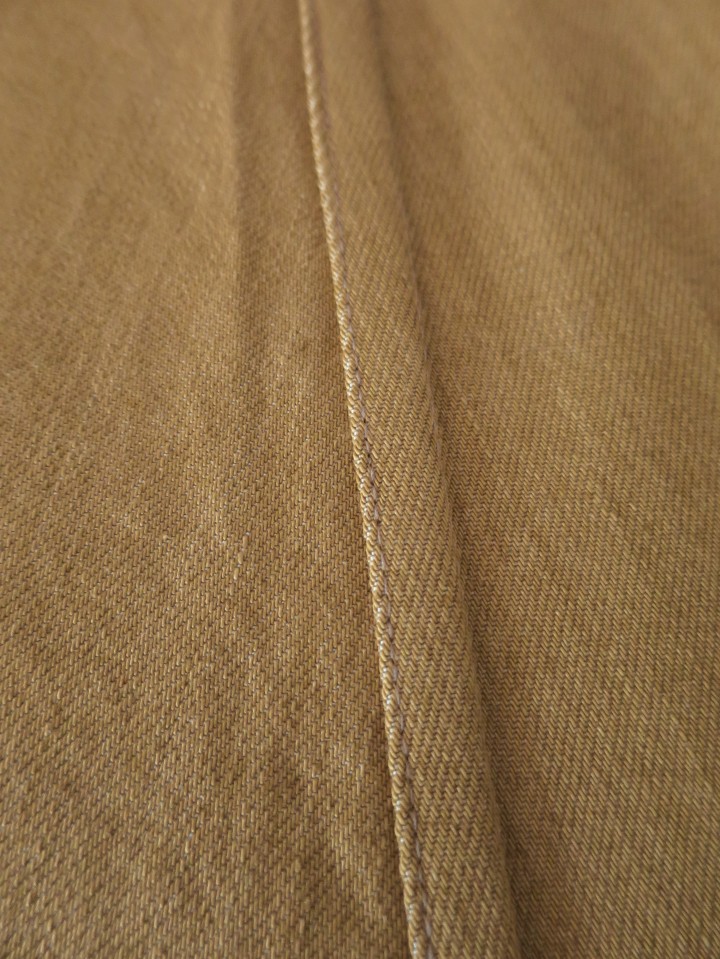
The instructions are very clear and well-written with great illustrations. I love the construction methods of the Rosari, especially the neat way the hem tucks around the front button placket. I had imagined I would use my overlocker to finish the seams inside the skirt, but this is so unbelievably neat that there was not a single seam which required any kind of finishing! This is because I chose to use flat fell seams, which are mentioned in the instructions as an option.
A flat fell seam is made by sewing the seam with wrong sides together, before trimming one of the raw edges to 5mm and then folding the other raw edge over the first. You then topstitch the seam to the skirt. I think these may be the most satisfying seams I have ever sewn!


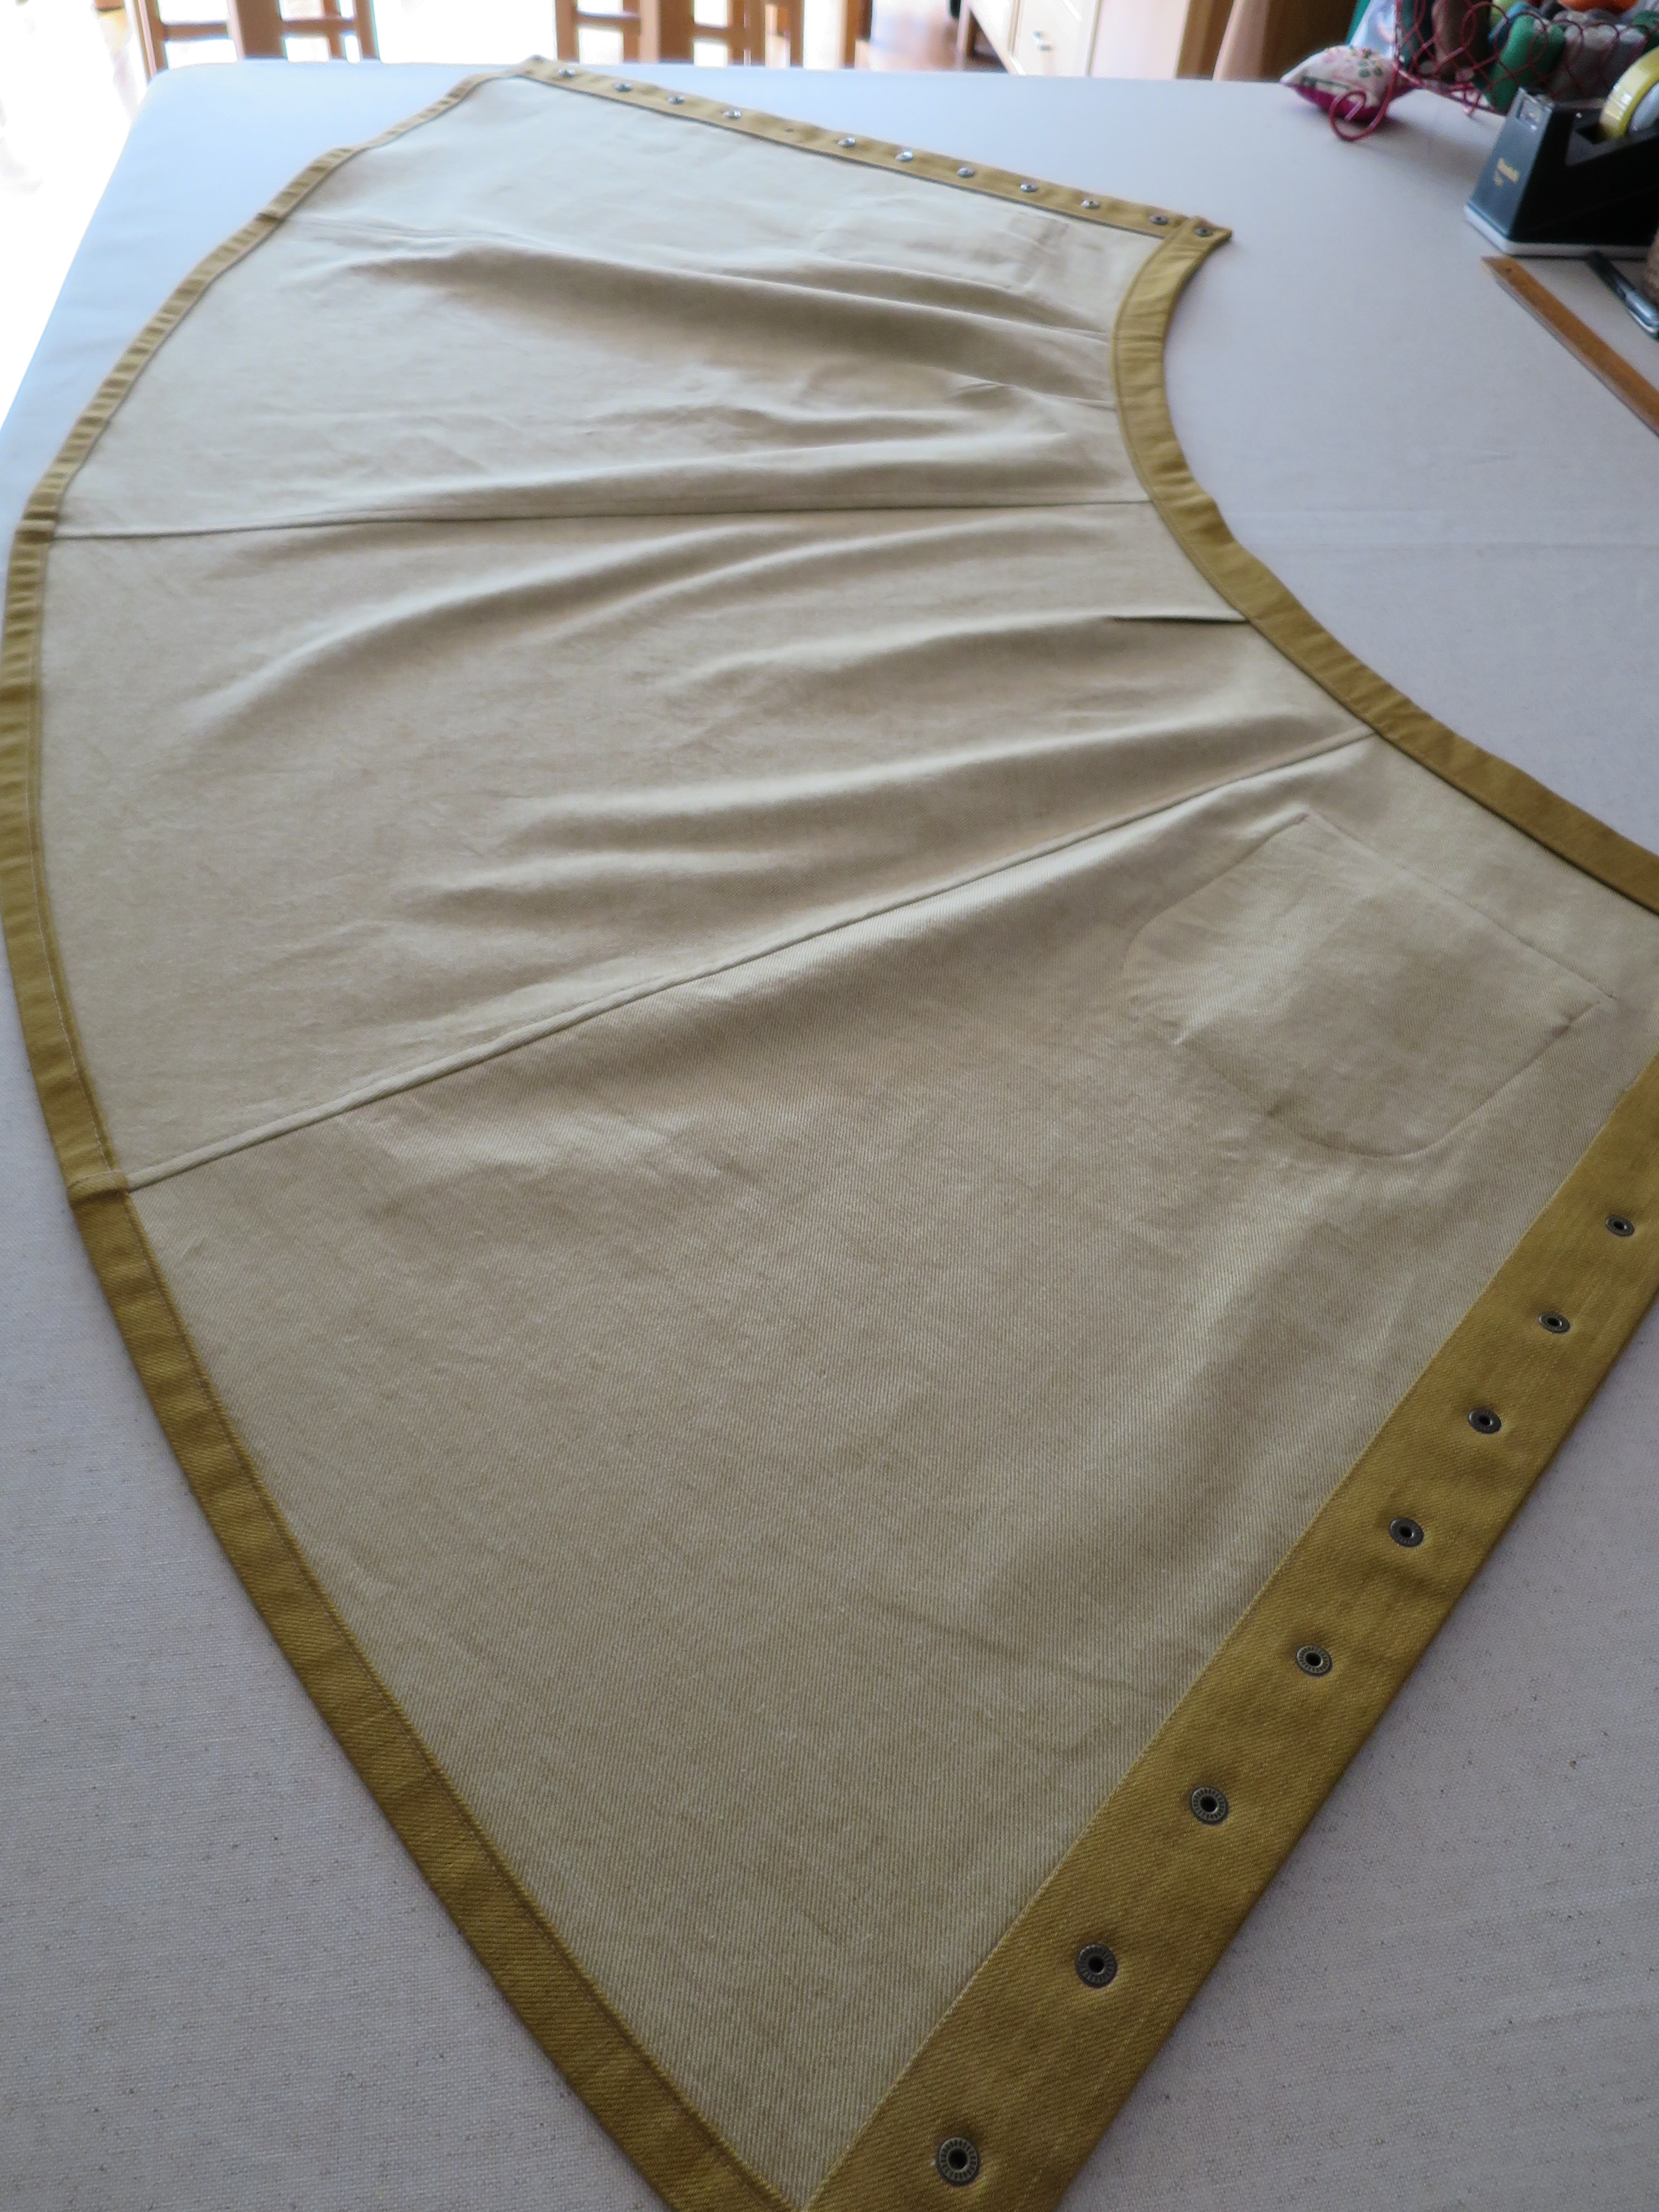
And it just keeps getting better – take a look inside. The ultimate tidy finish!
I treated myself recently to a set of Prym Vario pliers. After years of hammering holes and occasionally butchering snaps, this was £15 well spent. These pliers have attachments for piercing the holes, and then you just pop in a different attachment for the fastening you are using and squeeze them on. You don’t even need super-human strength: one good squeeze and you’re done!


I didn’t bother adding belt loops to my skirt as I know I won’t wear a belt with it so I decided to cut a corner here. Altogether this was so much fun to make – a very happy afternoon’s work. Oddly, when I tried it on – although the fit is perfect – I found I didn’t love it as much as I wanted to. Partly this may be because I’m not such a separates person and found that I didn’t have a top that I really wanted to pair with this skirt. Maybe I’ll need to sew one! But here it is in all it’s glory – somehow I love it in the photos but I’m not so sure in the mirror!

I love this version and I also love Fiona’s, so I obviously have a soft spot for mustard Rosari skirts! The neatness of the inside seams really appeals too and yours is perfectly neat, it looks fab. x
LikeLike
Great looking skirt. I love the ’70s vibe it has without looking retro. Ditching the belt loops was smart as it might’ve made the waistline too busy. I hope you fall in love with it. If not, let me know.
LikeLike
Gorgeous skirt, I think it looks amazing on you and the colour is fab. I think I need more separates but find them harder to make them than dresses. Love the idea of a mustard colour and it goes great with blue. It’s a keeper!! You should definitely wear it.
LikeLike
I love your skirt! The colour and buttons are amazing, and it works really well with your outfit choice.
LikeLike